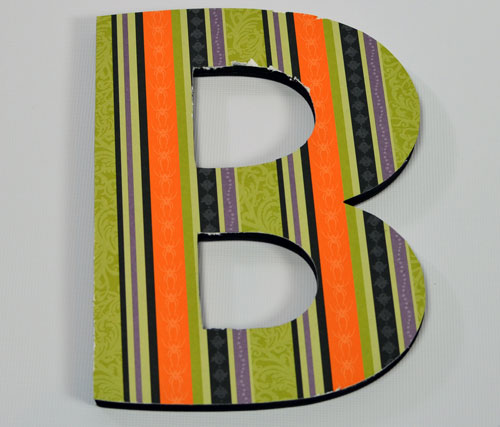

Decorating chipboard letters and frames is one of my favorite crafts. The results of this inexpensive, yet simple project, are amazing. There are countless project you can make using this basic technique. I will be uploading projects frequently under the tag of "chipboard letters".
You will need:
- Chipboard letter(s) {Amazon link
}
- Scrapbook paper
- Acrylic Craft Paint {Amazon link
}
- Mod Podge {Amazon link
}
- Paint brushes {Amazon link
}
- X-Acto knife {Amazon link
}
- Craft Sponge amazon link
}
- Stamp Pad {Amazon link
}
- Self-healing cutting board (not shown) {Amazon link
}
Step 1

Paint the BACK, sides and just a tad of the front of the chipboard letter with acrylic craft paint. Wait 10 minutes and paint a second coat. Pick a color that matches/coordinates with your paper.
Step 2

With a hard bristled paint brush, brush the BACK of your scrapbook paper with Mod Podge. {Note: I was using a double sided paper. The striped side is my front.} It is best to use a semi-thick or thick paper. My favorite is Stampin' Up's paper. If the paper is too thin, it will tend to tear while cutting when it gets wet from the Mod Podge.
Step 3

Place the chipboard letter onto the paper immediately. Remember to put the FRONT of the letter (the unpainted side) facing the paper. Press firmly.
Step 4

Turn the paper and letter over. Smooth down the paper onto the chipboard letter, pressing down slightly over the sides. Let dry about 10 minutes.
Step 5

Turn the covered chipboard letter over. With a very sharp X-Acto knife, trim the paper from the chipboard letter.

Step 6

Tap your sponge several times onto your stamp pad. If you are using a new sponge, it might not look like you have any ink on your sponge, but you do. Choose a color that matches the color you painted the back of your letter. Dab your sponge on the edge of the letter in a dab - then drag toward the edge motion. Repeat around all edges. You can use as much or as little ink as you'd wish to get the desired effect. Inking the edges will give your letter a finished look.

Your chipboard letter is now finished! You can add embellishments if you like or use them just the way they are.

Using the affiliate links in this blog to make purchases helps support my site. Thank you in advance!

Can you ink using a sponge and acrylic paint instead?
ReplyDeleteAbsolutely!
Delete