Saturday, September 29, 2012

Homestyle Vegetable Beef Stew

Homestyle Vegetable Beef Stew

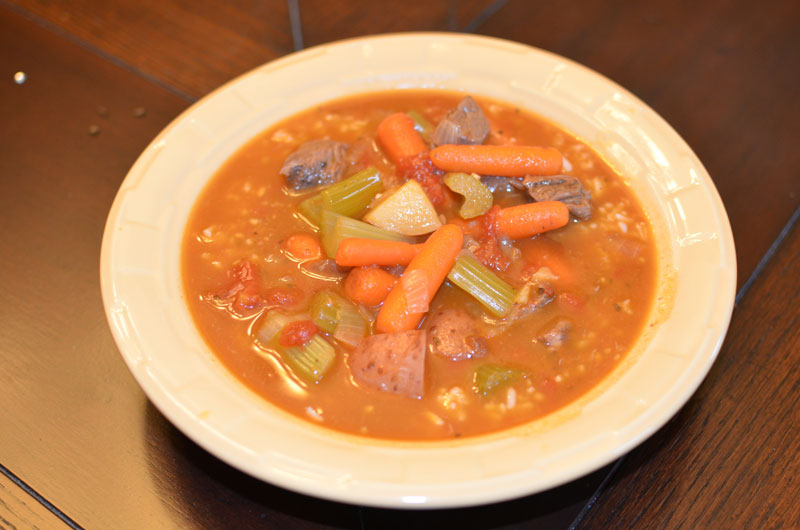
A hot bowl of homestyle vegetable beef stew is my number one comfort food. Great to enjoy on a cold winter evening or anytime of the year!

Ingredients:

1-2 pounds beef stew meat, cut into 1 inch cubes
1/3 cup Italian dressing
3-1/2 cups water
3 beef bouillon cubes
1 (14.5 oz) can diced tomatoes
1 can beef broth
1 (8 oz) can tomato sauce
1 teaspoon minced garlic
1 teaspoon basil or 1 bay leaf
1 teaspoon oregano
1/4 teaspoon black pepper
2-3 medium red potatoes (or 1 large baking potato) cut into small chunks
6 celery stalks cut into 1 inch chunks
1 small bag of baby carrots
1 medium onion, chopped
1 tablespoon flour or corn starch (optional)
Rice

Directions:

In a tall soup pot, brown meat in salad dressing over medium heat.

Add water, beef bouillon cubes, tomatoes, beef broth, tomato sauce, garlic and spices. Bring to a boil. Cover and simmer on med-low for 45 minutes. Stir about every 15 minutes.

Add potatoes, celery, carrots and onions. Simmer over medium heat for 2 hours. Stir about every 20 mintues.

The stew will thicken as it cooks. If it is not thick enough for your liking, then add flour or corn starch to a small amout of warm water and stir until disolved. Add mixture to stew.

Serve stew over rice and enjoy!


Bridget Davet / Davet Designs

Monday, September 24, 2012

Key Lime Pie Wedding Favor

Key Lime Pie Wedding Favor

Such a simple yet elegant wedding favor submitted by a customer. The mini-key lime pies were purchased from her local bakery and came already enclosed in the clear boxes. Ribbon was then added (purchased from Hobby Lobby, Michaels, Walmart, etc.). The clear sticker with a simple monogram purchased from Davet Designs adds the perfect finishing touch.


Bridget Davet / Davet Designs

Monday, September 17, 2012

Stamped Tile Coasters - Fleur de Lis

Stamped tiles

I just love stamped tile coasters. These fun to make inexpensive tile coasters are the perfect handmade gift for just about any occasion. Use your favorite stamps to create unique and personalized gifts.

You will need:

Stamped tile supplies

  • 4”x4” Tumbled marble or Travertine tiles (9 per box for about $4.50)
  • StazOn stamp pads (black and Timber Brown)
  • Stamps (Background and Main images)
  • Sponge
  • Sticky back corksheets (Michael’s) cut to 3.5” x 3.5”

Instructions

I bought these smooth faced Travertine tiles at Lowe's for $4.50 per box of 9. You can also use the ones that aren't quite so smooth, depending on your preference. Wipe the tiles clean with a damp cloth and let dry completely.

Begin by inking up your large background stamp with black Stazon™ ink and stamp your tile. Use a generous amount of pressure. Don’t worry if your image is not stamped perfectly. This will give your tile a unique antique look. I used the "French Script" stamp from Stampin' Up.

Stamp your main image using black Stazon™ Ink. Allow the images to dry for about 10 minutes. If you'd like to use a non-solid image and don't want the background image to show through, see my other tile coaster tutorials. {taged: tile coasters}

Using a sponge, lightly tap sponge onto the brown Stazon™ ink pad. Begin on the outer corners and dab/rub toward the center. Continue to do all 4 coners and the sides to give it an anituqe look.

Allow tiles to dry completely overnight. Bake the tiles in your oven to heat set the inks (350° for approximately 30-45 minutes). There is no need to spray or seal your tiles. You want the natural stone to maintain it's absorbency.

Stick a piece of cork backing to each tile. I bought a large roll of sticky back cork from Michael's and cut into 3.5 inch squares. You can also use small round felt pieces in each corner and glue, but I feel the cork works better and looks more polished.

Stamped tile supplies

Wrap 4 tiles in a bundle with ribbon or twine for a perfect handmade gift!

Stamped tiles
Stamped tile supplies

Bridget Davet / Davet Designs

Thursday, September 13, 2012

Chocolate Oatmeal Chocolate Chip Raisin Cookies

Chocolate Oatmeal Chocolate Chip Raisin Cookies

What is better than Oatmeal Raisin Cookies with chocolate chips? CHOCOLATE Oatmeal Raisin Cookies with chocolate chips! I prefer to use bittersweet dark chocolate chips, but you can you any kind you prefer. This recipe has half the amount of sugar of most recipes, but just as yummy! The raisins and chocolate chips will add even more sweetness. This recipe makes 16 cookies.

Ingredients:

1 cup all-purpose flour
3 tablespoons unsweetened cocoa powder
1 teaspoon baking powder
1/2 teaspoon baking soda
1/2 teaspoon ground cinnamon
1/2 cup (1 stick) margarine or butter
1/4 cup brown sugar
1/4 cup white sugar
1-1/2 teaspoons vanilla extract
3-1/2 tablespoons applesauce
1-1/2 cup rolled oats
1/2 cup chocolate chips
1/3 cup raisins

Preheat oven to 350 degrees F. Grease cookie sheets. Stir together the flour, cocoa, baking powder, baking soda and cinnamon.

In a separate bowl, cream together the margarine or butter, brown sugar, white sugar and vanilla using a wooden spoon. Stir in the dry ingredients from other bowl and mix completely.

Add the oats and mix completely. Then fold in chocolate chips and raisins.

Roll approx. 1 heaping tablespoon into a ball and then flatten slightly. The mixture will be sort of wet. Place 8 per cookie sheet.

Bake for 10 - 11 minutes until lightly browned. Allow cookies to cool on baking sheet for 10 minutes. Transfer to wire rack to cool completely.


Bridget Davet / Davet Designs

Tuesday, September 11, 2012

Basic Chipboard Decoration - Scrabook Paper

Basic Chipboard Decoration - Scrabook Paper

Decorating chipboard letters and frames is one of my favorite crafts. The results of this inexpensive, yet simple project, are amazing. There are countless project you can make using this basic technique. I will be uploading projects frequently under the tag of "chipboard letters".

You will need:
Chipboard Letter supplies

Step 1

Chipboard Letter supplies

Paint the BACK, sides and just a tad of the front of the chipboard letter with acrylic craft paint. Wait 10 minutes and paint a second coat. Pick a color that matches/coordinates with your paper.


Step 2

Chipboard Letter - mod podge paper

With a hard bristled paint brush, brush the BACK of your scrapbook paper with Mod Podge. {Note: I was using a double sided paper. The striped side is my front.} It is best to use a semi-thick or thick paper. My favorite is Stampin' Up's paper. If the paper is too thin, it will tend to tear while cutting when it gets wet from the Mod Podge.


Step 3

Chipboard Letter - apply paper

Place the chipboard letter onto the paper immediately. Remember to put the FRONT of the letter (the unpainted side) facing the paper. Press firmly.


Step 4

Chipboard Letter - smooth paper

Turn the paper and letter over. Smooth down the paper onto the chipboard letter, pressing down slightly over the sides. Let dry about 10 minutes.


Step 5

Chipboard Letter - trim paper

Turn the covered chipboard letter over. With a very sharp X-Acto knife, trim the paper from the chipboard letter.

Chipboard Letter - trim paper
If your X-Acto knife if not very sharp (mine was not very sharp and I was out of replacements), the paper will tear {as you can see in the picture, but covered up well enough for this project.}


Step 6

Chipboard Letter - ink sides

Tap your sponge several times onto your stamp pad. If you are using a new sponge, it might not look like you have any ink on your sponge, but you do. Choose a color that matches the color you painted the back of your letter. Dab your sponge on the edge of the letter in a dab - then drag toward the edge motion. Repeat around all edges. You can use as much or as little ink as you'd wish to get the desired effect. Inking the edges will give your letter a finished look.

Chipboard Letter - finished with embellishments

Your chipboard letter is now finished! You can add embellishments if you like or use them just the way they are.

Bridget Davet / Davet Designs

Using the affiliate links in this blog to make purchases helps support my site. Thank you in advance!

Tuesday, September 4, 2012

New Onesie / Pregnancy Sticker Packaging

Starting this weekend, our onesie/pregnancy monthly and weekly stickers will now come in a cool package, ready for gift giving! Each set of stickers will come in a clear package with a full color glossy card inside (see below) with instructions for use on the other side. I will post more pictures soon of the final product. These are great gifts for soon-to-be and new mommy!

Bridget Davet / Davet Designs

Saturday, September 1, 2012

Stuffed Bell Peppers

Stuffed Bell Peppers

Stuffed Bell Pepper

This simple recipe will sure to delight even the pickiest eaters! Great recipe to double for leftovers or freezer meals.

Ingredients:

4 large bell peppers
1 cup cooked rice
1 lb. ground beef
1 onion diced
4 teaspoons minced garlic
1/8 teaspoon black pepper
1/4 teaspoon Rosemary
1/2 teaspoon Basil
1/2 teaspoon Parsley
1/2 teaspoon Oregano
1/2 teaspoon Thyme
1 jar spaghetti sauce or 16oz homemade sauce

Preheat the oven to 350 degrees F.

Remove the tops and seeds of the bell peppers.

In a large saute pan or skillet, saute ground meat, onion, garlic, black pepper, rosemary, basil, parsley, oregano and thyme over medium heat. Cook until the meat is browned, stirring with a heavy wooden spoon to break up the lumps. Remove from the heat and stir in cooked rice.

Stuff the bell peppers with the mixture and place in a baking dish. Pour spaghetti sauce over and around the bell peppers. Cover and bake 1 hour and 45 minutes.

Remove from the oven and let rest for 10 minutes before serving.


Bridget Davet / Davet Designs
Related Posts Plugin for WordPress, Blogger...