Sunday, December 29, 2013

Chipotle and Rosemary Roasted Pecans

Chipotle and Rosemary Roasted Pecans

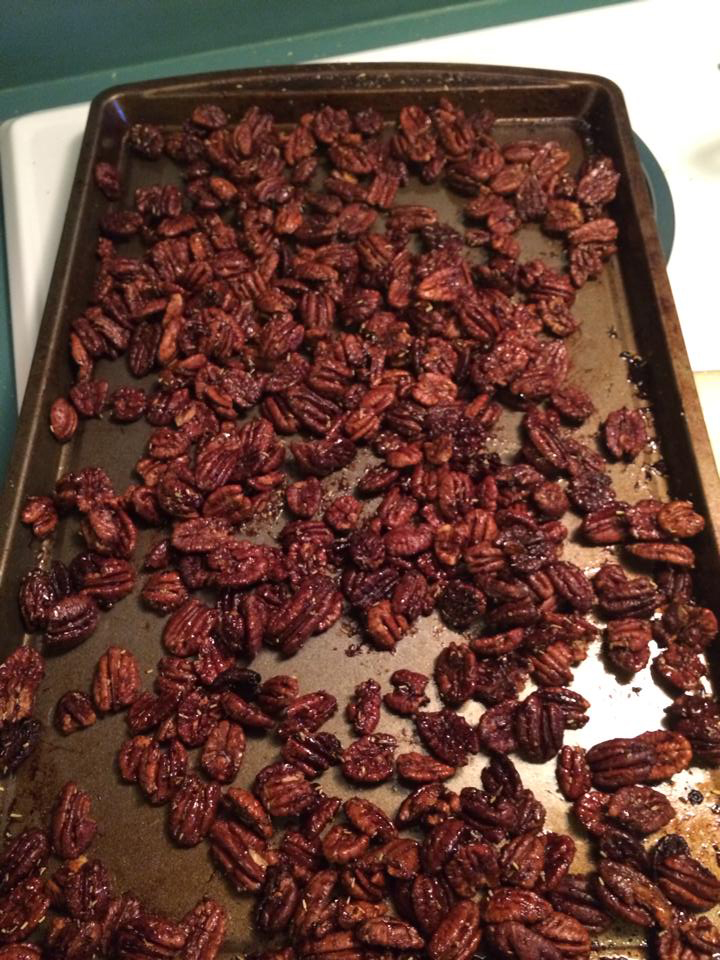
My friend brought my husband and I a box of these tasty Chipotle and Rosemary Roasted Pecans and we ate the whole box! She shared with me this recipe which used mixed nuts instead of just pecans. These quick and easy pecans are great to package and give as holiday gifts.

You will need:

Preheat oven to 350 degrees F. Grease sheet pan generously with vegetable oil. Combine the pecans, 1 tablespoons of vegetable oil, the maple syrup, brown sugar, orange juice and chipotle powder on the sheet pan. Toss to coat the nuts evenly. Add 1 tablespoon of the rosemary and 1 teaspoon of salt and toss again. If using dried rosemary, I find it easier to mix the rosemary and salt in an empty spice container and sprinkle from there. The second time I made these, I lined my sheet pan with a non-stick silicone baking mat {affiliate link } and it saved me the headache of scrubbing the sheet pan! Follow the directions the same otherwise.

Spread the pecans evenly on pan. Roast the pecans for 25 minutes, stirring twice with a large metal spatula, until the pecans are glazed and golden brown. Remove from the oven and sprinkle with 1 more teaspoon of salt and the remaining 1 tablespoon of rosemary.

Toss well and set aside at room temperature, stirring occasionally to prevent sticking as they cool. Taste for seasoning. Serve warm or cool completely and store in airtight containers at room temperature.

Chipotle and Rosemary Roasted Pecans
Bridget Davet / Davet Designs

Using the affiliate links in this blog to make purchases helps support my site. Thank you in advance!

Saturday, December 28, 2013

Healthy Eggless Oatmeal Chocolate Chip Lactation Cookies

Healthy Eggless Oatmeal Chocolate Chip Lactation Cookies

When my milk supply was low, I tried several lactation cookie recipes. I really did not like any of them and they all seemed to have an odd texture. I set out to make the perfect healthy and tasty lactation cookie recipe and this is what I came up with. I make them eggless since I have a sensitivity to eggs. I started with my Chocolate Oatmeal Chocolate Chip Raisin Cookies recipe and then modified it from there. This recipe is for regular oatmeal chocolate chip cookies, but if you want chocolate oatmeal cookies, I've added the option within the recipe. I prefer to use bittersweet dark chocolate chips, but you can you any kind you prefer. This recipe has half the amount of sugar of most recipes, but just as yummy! I actually prefer even less sugar and use only 1/4 cup each of the white and brown sugars. The raisins and chocolate chips will add even more sweetness. You could add nuts to recipe as well. This recipe makes 16 cookies.

You will need:


Instructions

Preheat oven to 350 degrees F. Stir together the flour, baking powder, baking soda, flaxseed, brewers yeast and cinnamon. (Add 3 tablespoons of cocoa powder to this mix if you'd like chocolate cookies)

In a separate bowl, cream together the margarine or butter, brown sugar, white sugar and vanilla using a wooden spoon. Stir in the applesauce. Stir in the dry ingredients from other bowl and mix completely.

Add the oats and mix completely. Then fold in the chocolate chips and raisins.

Roll approx. 1 heaping tablespoon into a ball and then flatten slightly. The mixture will be sort of wet. Place 8 cookies per cookie sheet lined with a silicone baking mat.

Healthy Eggless Oatmeal Chocolate Chip Lactation Cookies

Bake for 10 - 11 minutes until lightly browned. Allow cookies to cool on baking sheet for 10 minutes. Transfer to wire rack to cool completely.


Healthy Eggless Oatmeal Chocolate Chip Lactation Cookies

Want to know how I organize and store all my recipes on my computer and share on all my devices? I use the Cookin' software! I can import recipes from the web, add my personal ones, add pictures, print pdfs, and then view them from my iPad, iPhone, etc!


Bridget Davet / Davet Designs

Using the affiliate links in this blog to make purchases helps support my site. Thank you in advance!

Thursday, October 24, 2013

DIY Halloween Plate Charger

DIY Inexpensive Halloween Plate Charger

Decorate your home or make as a gift! This DIY Inexpensive Halloween Plate Charger can be made for under $2.

You will need:

  • Plate Charger ($1 from Hobby Lobby)
  • vinyl decals or vinyl sheets {affiliate link }
  • scissors, punches, vinyl cutting machine, etc (if not using precut vinyl decals)

Instructions

You will need to either purchase pre-cut vinyl decals or you can cut your own from plain vinyl sheets. You can purchase vinyl from your local craft store, online or from Davet Designs.

Step 1

DIY Inexpensive Halloween Plate Charger using vinyl decals

Apply your Halloween Vinyl Decals using the "How to apply vinyl lettering and decals" tutorial (see label "how to apply vinyl lettering" on this blog or click link).

Step 2

You're done! Plate chargers are great to display on a stand or hang on the wall.


Bridget Davet / Davet Designs

Using the affiliate links in this blog to make purchases helps support my site. Thank you in advance!

DIY Inexpensive Halloween Container

DIY Inexpensive Halloween Container Tutorial

Make your gifts extra special by jazzing them up! This DIY Inexpensive Halloween Container can be made for cheap and in a short time frame.

You will need:

KraftyBlok Nativity Scene With Vinyl Decals Tutorial supplies

  • 1 - container ($1 from Dollar Tree)
  • vinyl decals or vinyl sheets {affiliate link }
  • scissors, punches, vinyl cutting machine, etc (if not using precut vinyl decals)

Instructions

You will need to either purchase pre-cut vinyl decals or you can cut your own from plain vinyl sheets. You can purchase vinyl from your local craft store, online or from Davet Designs.

Step 1

DIY Inexpensive Halloween Container using vinyl decals

Apply your Halloween Vinyl Decals using the "How to apply vinyl lettering and decals" tutorial (see label "how to apply vinyl lettering" on this blog or click link).

Step 2

You're done! What a quick and easy way to jazz up a boring container! You can use your container as a treat basket, baked goods container, gift, etc. Makes for a nice addition to a Halloween gift for teachers as well.


Bridget Davet / Davet Designs

Using the affiliate links in this blog to make purchases helps support my site. Thank you in advance!

Tuesday, October 15, 2013

Frosted Painted Glass Jack-O-Lantern

Frosted Painted Glass Jack-O-Lantern

My challenge this week (if I choose to accept), involved making something pumpkin-like. We are having a "pumpkin exchange" next week at our Mom's-Night-In Craft Night. Each person will bring a craft pumpkin valued at around $10 to exchange. The instructions said "It doesn't have to be anything specific: glass, plastic, ceramic, burlap, glittery etc." I took that to mean "think outside the box", oh Craft Master. Visions of a glass pumpkin danced in my head. My first thought was to paint the inside of the glass with orange enamel paint and use black vinyl cutouts for the face. However, I have been wanting to do a frosted glass project for quite some time, so there you have it!

You will need:

Frosted Painted Glass Jack-O-Lantern Candy Bowl supplies


Instructions

I purchased the glass bowl from Hobby Lobby for $6.99 minus my 40% off coupon. I ended up having to use some adhesive remover to fully remove the stickers from the bottom of the bowl. Then I washed and dried the bowl.

Frosted Painted Glass Jack-O-Lantern Candy Bowl supplies

Draw your face for the Jack-O-Lantern on the BACKSIDE of the vinyl since it is paper and easier to write on than the vinyl itself. You can use any vinyl you choose, but I used the Oracal 631 Exhibition vinyl since it is a semi-permanent vinyl and easy to peel off. Vinyl is sold at most craft stores or you can buy vinyl online {affiliate link }.

Frosted Painted Glass Jack-O-Lantern Candy Bowl supplies

Cut out your pieces. Peel and stick your vinyl cutouts onto the glass and smooth down firmly.

Frosted Painted Glass Jack-O-Lantern Candy Bowl supplies

Take you bowl outside and spray paint the outside of the bowl. Use newspaper or something similar underneath. Follow the directions on the spray can for correct use. This was my first go round with frosted spray paint. I used Krylon Frosted Glass Finish purchased from Michael's for $9.99 minus my 40% off coupon. I did use almost half the small can for this one bowl. I sprayed 2 coats waiting about an hour between each coat. {My husband spray painted the second coat so I could take this picture :)}

Frosted Painted Glass Jack-O-Lantern Candy Bowl supplies

Let your pumpkin fully dry (about an hour). Bring inside and carefully peel off the vinyl. The frosted paint WILL scratch off.

Frosted Painted Glass Jack-O-Lantern Candy Bowl

VoilĂ ! This was a very quick and easy project that I think came out better than expected. Total cost was $10.18 plus tax, but I had enough spray paint to do a little over 2 projects, bringing the total down to $7.19 plus tax. I would imagine had I shopped around, I could have gotten a glass bowl at the dollar store for much cheaper, but I am on a time crunch. This would make a perfect hostess gift or any occasion present. Fill it with candy, potpourri, etc. before you give as a gift for that little something extra, or what we from Louisiana call "lagniappe"!


Bridget Davet / Davet Designs

Using the affiliate links in this blog to make purchases helps support my site. Thank you in advance!

Related Posts Plugin for WordPress, Blogger...