Wednesday, November 26, 2014

Baked Turkey Recipe - Easy, yummy, moist - best ever secret turkey recipe

Baked Turkey Recipe - Easy, yummy, moist - best ever secret turkey recipe

I told my husband I would NEVER EVER share this recipe with anyone, including him. I figure if we ever got a divorced, I wouldn't want his new wife to be able to make this for him, therefore he will have to stay with me in order to eat the best ever baked turkey. Ok, I know, I know, a little dramatic, but hey, that's me! There are thousands of recipes on the web claiming to be the best, the juiciest, easiest, etc, but this one truly is just that. The best part of this recipe is that you never have to "babysit" the turkey. You simply put it in the oven and take it out when it is done, no basting required. What's the secret? I will explain that part as I tell how to make it.

You will need:

  • 1 Turkey (I used about a 13-14 lb. Turkey)
  • 1 can cream of chicken soup
  • 2 chicken bouillon cubes
  • 5-10 stalks of celery
  • Salt and pepper

Instructions

Short history behind how my recipe came about. Many ages ago, I decided to cook a turkey and have friends over for a dinner. Problem was, I had never cooked a turkey before. I called a friend and asked her how to cook a turkey. She spoke fast and told me very quickly how to cook the turkey. I didn't even have time to write it down. I did whatever I could remember to do to the turkey. All I remember is that the turkey took longer to cook than other people's turkey. She came over for the dinner and was wowed by my awesome turkey. Come to find out, I really didn't do much of anything the way she told me except maybe the cream of chicken part. Over the past 12 years, I've continued to make my famous turkey the same way, with perfect results every time {even the Thanksgiving I forgot to add the water}.

Baked Turkey Recipe - Easy, yummy, moist - best ever secret turkey recipe

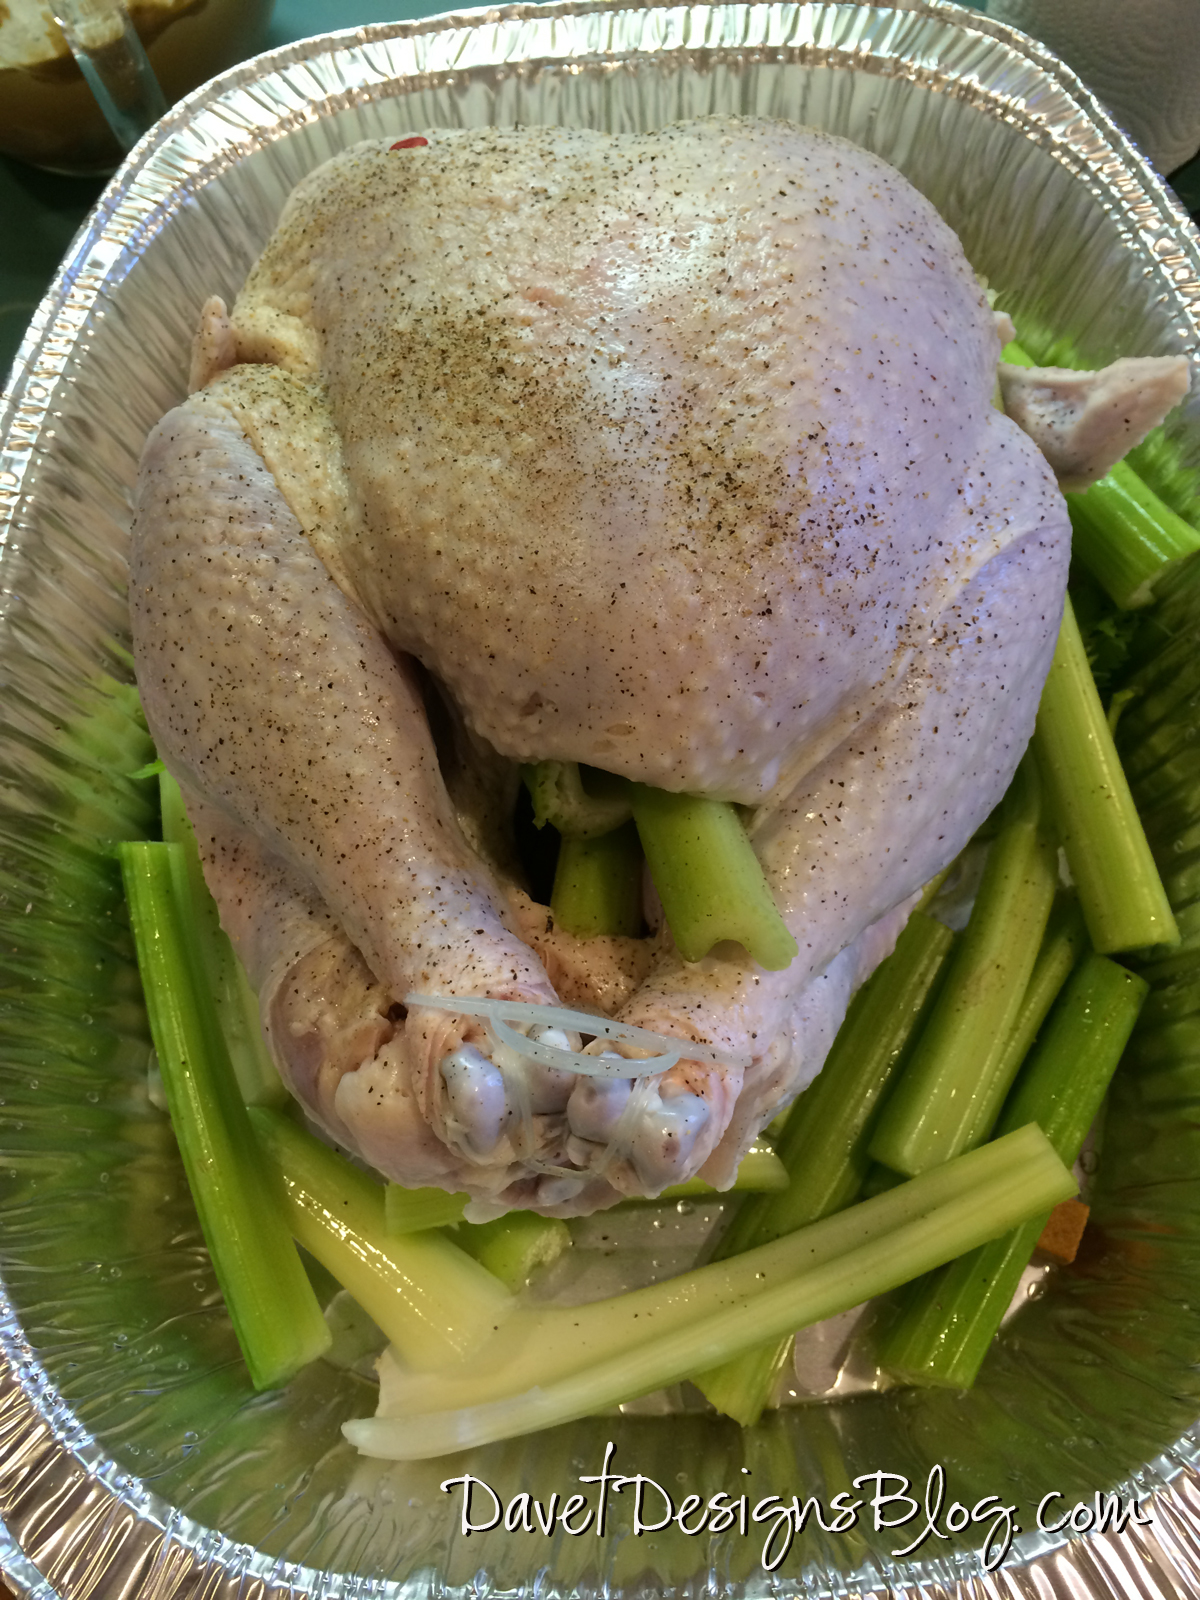
Wash the turkey and discard any of the bags of turkey pieces, necks and such (unless you want them for another recipe). Place the turkey in your pan. I use the disposable kind, just make sure the bottom is supported with a baking stone or cookie sheet.

Wash your celery and cut stalks in half. Place the stalks around the turkey in the pan and a few in the cavity. Sprinkle salt (I usually skip the salt) and pepper over the whole turkey.

Baked Turkey Recipe - Easy, yummy, moist - best ever secret turkey recipe

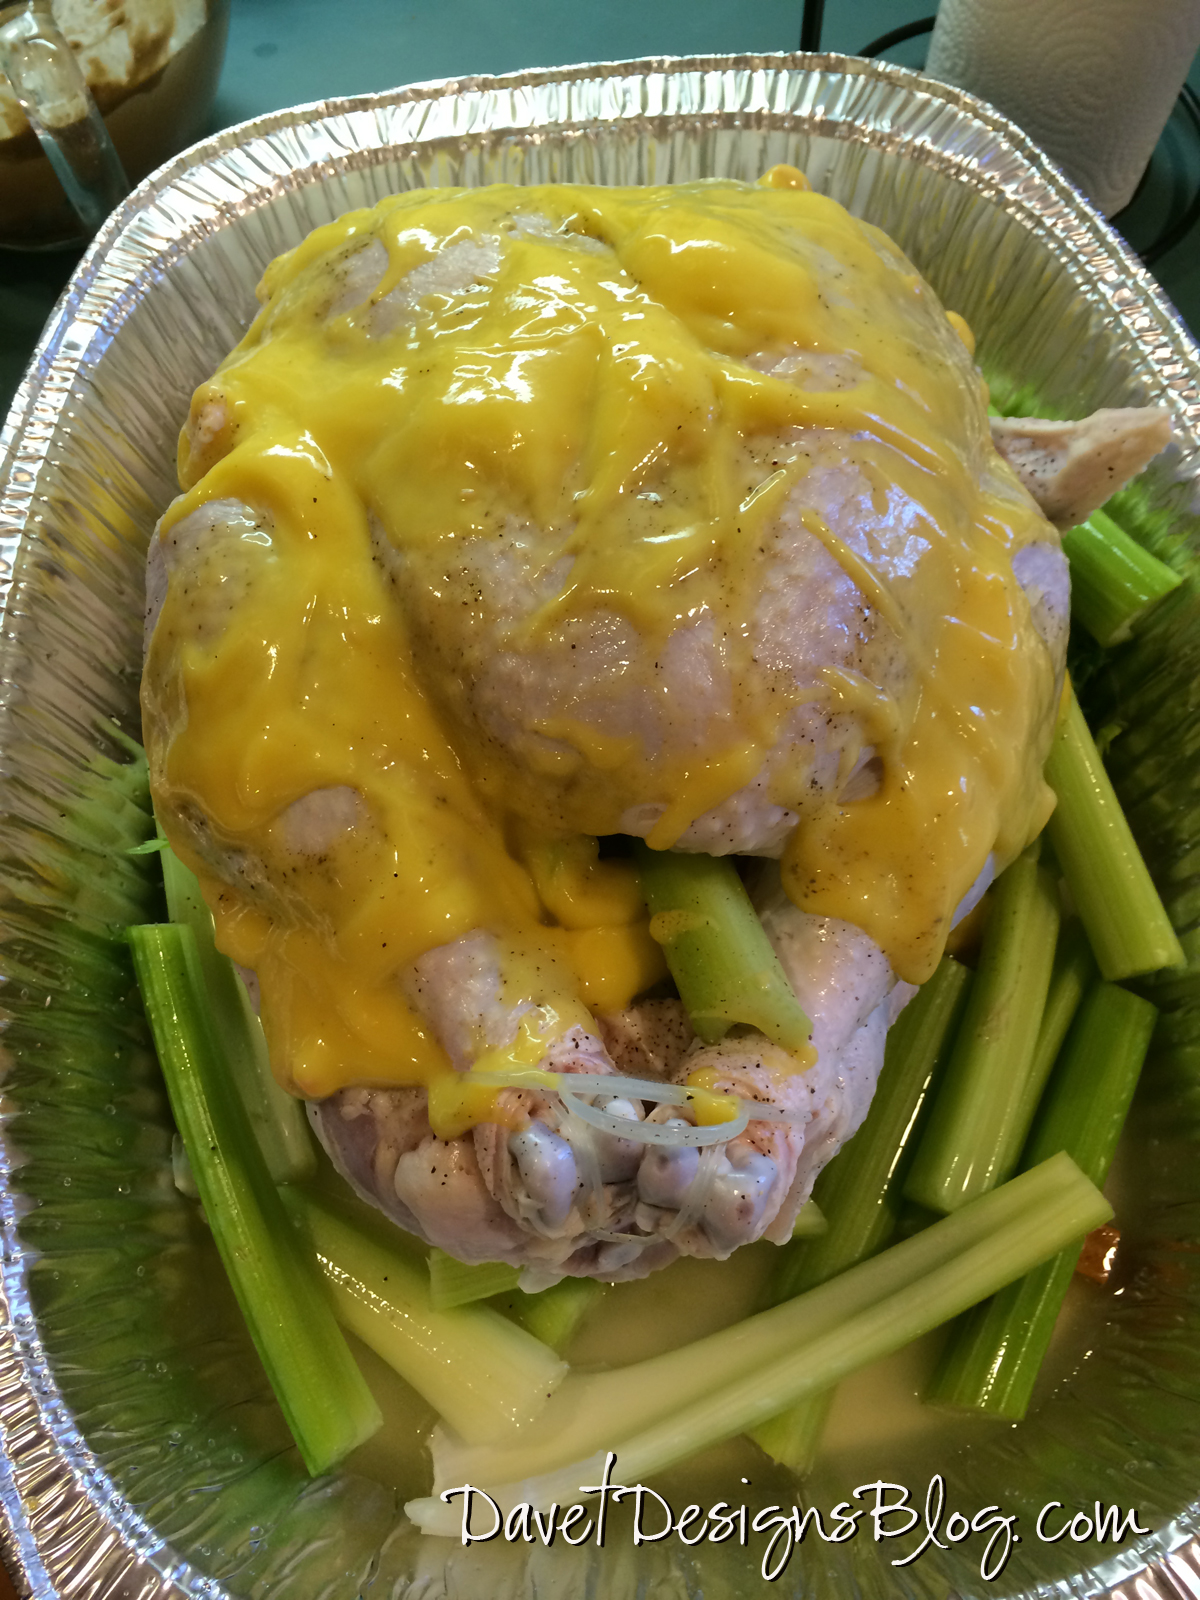
Open your can of cream of chicken soup and dump it on top of the turkey and sort of smear it around. Fill the can with water and dump into the pan. Place 2 chicken bouillon cubes into the water.

Cover the turkey completely with aluminum foil. You can prepare this the night before and put into the refrigerate.

Here the easiest part of all. Place the turkey in the oven. Bake at 335 degrees. Don't peek! Leave it covered the whole time - no basting! About 5-1/2 hours later, your turkey is done! I know what you are thinking about now. 5-1/2 hours??? I usually cook my turkey for about 3. Won't the turkey be an overcooked mess? Here is where the "secret" comes in to play. Most turkeys are roasted, like you'd roast a chicken. When roasting, you have to keep basting, and the turkey is uncovered either all or most all of the time. With my recipe, you keep it covered the whole time which creates a sort of slow cooker type environment. That's the secret to my juicy turkey! Who knew! Now, I will say this, the turkey will not be "pretty". You know what I mean, those picture perfect magazine turkeys. The ones where the father figure gets out his nice carving set and carves the beautifully browned turkey on the elegant serving platter? Yeah, well this is what your turkey will look like:

Baked Turkey Recipe - Easy, yummy, moist - best ever secret turkey recipe

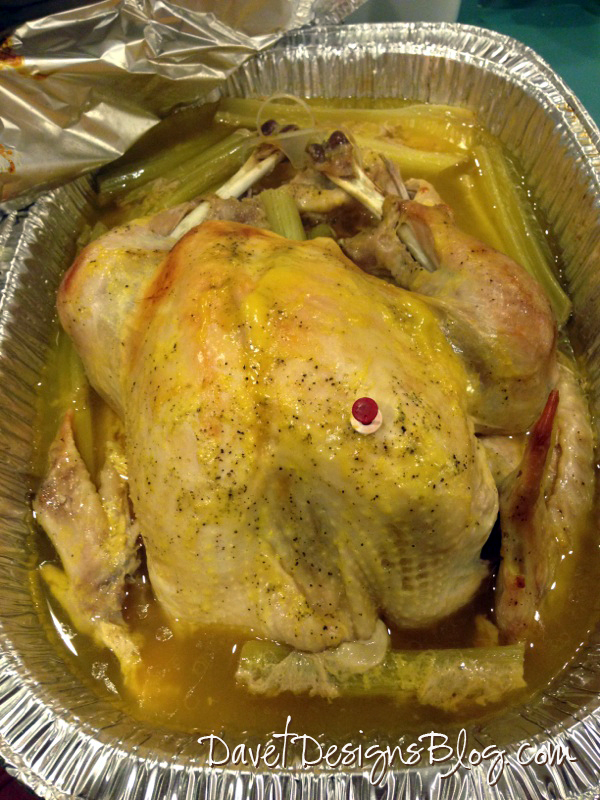
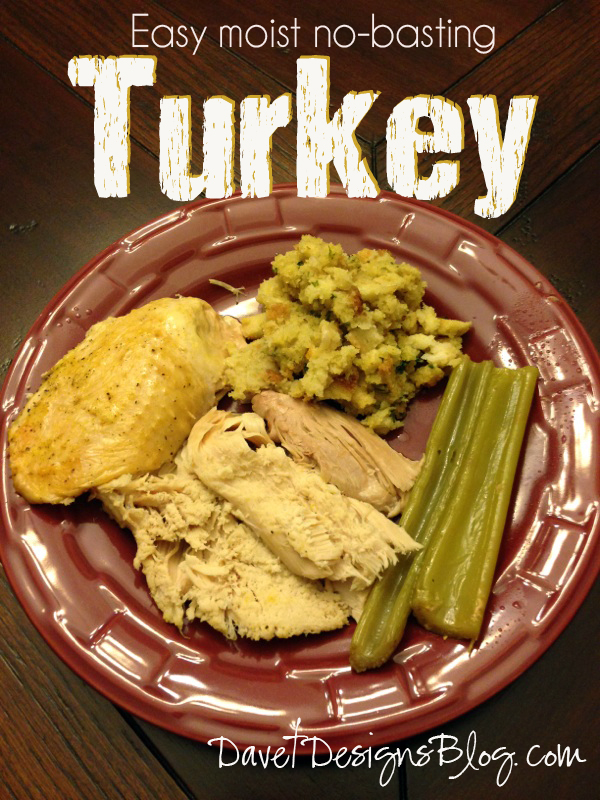
Yep, there you go, it isn't pretty! BUT, once you taste this wonderful turkey, you won't care one bit. After you take the turkey out of the oven do a check to make sure the little red thing is popped up if there is one in there, or use your thermometer to check the internal temperature.

Using a turkey baster, move some of the juice into a pan. You can simmer the juice on the stove to make a gravy of sorts if you'd like, but after years of doing this, I realized you really won't need it. Just put a little juice when you serve and that is all that is needed. Don't try to move the turkey out of the baking pan. The turkey will literally fall apart as you touch it. Get a knife and the best you can, try to carve the turkey. Have a nice serving dish on hand and as you cut the pieces of turkey, you can arrange them nicely into that pan. I say "try" to carve, because like I said, the turkey will be falling apart. Ever cook a chicken in a slow cooker? This will be similar to that. Just sort of cut/ pull yummy juicy pieces of turkey off the bone and move to your serving dish. Pour some of the juice over the turkey in the serving dish. Arrange the celery (my favorite part) onto the serving dish as well.

It really is as simple as that. Anyone can cook a turkey. Because of the cooking method, you have some play room with the time. It is hard to overcook the turkey when following this recipe. Enjoy and comment below how your turkey came out!

Here is a free pdf download of the recipe.

Want to know how I organize and store all my recipes on my computer and share on all my devices? I use the Cookin' software! I can import recipes from the web, add my personal ones, add pictures, print pdfs, and then view them from my iPad, iPhone, etc!


Bridget Davet / Davet Designs

Using the affiliate links in this blog to make purchases helps support my site. Thank you in advance!

Goulash - Perfect cold weather recipe

Goulash

I have to say, I hate the name "Goulash". Doesn't sound appetizing, but trust me, this is yummy to the tummy good! Anyhow, years ago I came upon a recipe from a friend. Over the years I have tweaked it quite a bit to come up with this yummy dish! I cook it often and my 1 and 2 year old both eat a full plate. I serve mine over pasta, but you could eat it just plain with crackers or fresh bread.

You will need:

  • 1 lb ground beef
  • 2 (16 oz)cans light red kidney beans (I use Bush's)
  • 2 (14.5 oz)cans diced tomatoes
  • 1 onion chopped or sliced
  • 1 Tablespoon garlic
  • 1/8 teaspoon black pepper
  • 1/8 teaspoon red pepper flakes
  • 1 teaspoon Tabasco Sauce
  • 1 Tablespoon Italian seasoning
  • Pasta of choice

Instructions

Goulash

In a large pot, cook ground beef, garlic and onions over medium heat until the ground beef is browned. Drain any fat. Add all the rest of the ingredients, except the pasta. Bring to a boil, then reduce heat to medium-low. Cover and cook for 2 hours, stirring occasionally.

Cook 3 cups of dry pasta per instructions on box. Bowtie or spirals are my favorite for this dish. You can add more Tabasco sauce on each serving if you want it slightly "hotter".

Serve over pasta or eat plain with crackers or fresh bread.

Here is a free pdf download of the recipe.

Want to know how I organize and store all my recipes on my computer and share on all my devices? I use the Cookin' software! I can import recipes from the web, add my personal ones, add pictures, print pdfs, and then view them from my iPad, iPhone, etc!


Bridget Davet / Davet Designs

Using the affiliate links in this blog to make purchases helps support my site. Thank you in advance!

Tuesday, November 25, 2014

How to dye clothespins with RIT dye tutorial

How to dye clothes pins with RIT dye tutorial

For the past few months I've been creating busy bags and craft projects for my toddler. Many of the them require colored clothespins, which I have been tediously painting. I came across a post on Pinterest for a clothespin wreath with dyed clothespin. Genius I tell you, just genius! Off I went to purchase clothespins and RIT dye. You can purchase the clothespins off of this Amazon link, but the cheapest is at Walmart in the laundry section (by the clothes hangers and ironing boards), NOT the craft section. The ones in the craft section are the same ones but in a different package and twice the price. I started with the red and green for a Christmas craft I'm making. Next I will make a ton of other colors for our busy bag and coloring matching projects for the kids.

You will need:

How to dye clothes pins with RIT dye tutorial


Instructions

How to dye clothes pins with RIT dye tutorial

First set up your dyeing station. Place a some paper towels under your containers. I use these Ziploc Containerbecause they are cheap and I can use them for my crafts and then throw away when they get old. Make sure you have extra paper towels handy in case you spill any dye, wipe it up immediately.

How to dye clothes pins with RIT dye tutorial

Put on your gloves. Pour 6 cups of hot water into one container. Add about 5-6 teaspoons of your Rit dye and stir.

How to dye clothes pins with RIT dye tutorial

Add your clothespins to the container, but don't overfill. I fit about 75 in one container. Try to fit them in nicely where they are not sticking up, but they will try to float.

How to dye clothes pins with RIT dye tutorial

To keep them from floating to the top {out of the dye}, fill a plastic bag with some water and close. Place the baggie on the top of the clothespins to weigh them down. Repeat this process for each color you have. I did red and green for this project.

Depending on how long you leave your clothespins in the dye will determine how saturated with color they will turn out. After a few minutes, I took out a few red and a few green, just so I would have some light ones on hand. Then, I went ahead and just left the rest in the container overnight. They came out nice and dark.

How to dye clothes pins with RIT dye tutorial

When you are ready to take them out, set up your drying station. I had 3 cookie sheets and lined them with wax paper and then paper towels on top of the wax paper.

How to dye clothes pins with RIT dye tutorial

Put on your gloves and take the clothespins out and place them on the paper towels. After a few hours, I took them off and put them on fresh paper towels. Let them dry completely before using. Do NOT use these to hang fabrics. The dye WILL bleed onto your clothes, use them for craft purposes only.

Here is a free pdf download of the instructions.


Bridget Davet / Davet Designs

Using the affiliate links in this blog to make purchases helps support my site. Thank you in advance!

Sunday, November 23, 2014

Cookie Cutter Bird Seed Feeder Ornaments

Cookie Cutter Bird Seed Feeder Ornaments

I'm always looking for cheap eco-friendly projects for our family. Cookie cutter bird seed feeder ornaments are quick and easy to make and my 2 year old could help in almost every step. This is one of the many blog post I found. These bird seed feeders can be hung outside or hung on the Christmas tree, then hung outside after Christmas. These would be cute for small gifts, addition to other gifts or party favors.

You will need:

Cookie Cutter Bird Seed Feeder Ornaments supplies


Instructions

Place your cookie cutters onto a cookie sheet lined with a Silicone Baking Mat or wax paper.

Cookie Cutter Bird Seed Feeder Ornaments

For my first batch, I doubled the recipe to make a little larger batch. The recipe makes 2-3 ornaments, doubling it will give you 4-6. Fill a large mixing bowl with one envelope of Knox gelatine. Boil the water and pour over the gelatine. Stir to mix well. This is where your little one can start to help, but be careful since the water will be hot. Stir until dissolved.

Cookie Cutter Bird Seed Feeder Ornaments

Pour in the bird seed and stir until completely mixed.

Cookie Cutter Bird Seed Feeder Ornaments

My little man had fun stirring, but I had to help him a bit.

Cookie Cutter Bird Seed Feeder Ornaments

Fill each cookie cutter with the mixture. My little one loved this part, even though I had to help him.

Cookie Cutter Bird Seed Feeder Ornaments

For our first batch, we filled 6 cookie cutters a little more than half full.

Cookie Cutter Bird Seed Feeder Ornaments

For our second batch, we filled 4 cookie cutters all the way to the top. Depending on how "tall" you want your bird seed feeders and how many you'd like to make, either way worked out just fine.

Cookie Cutter Bird Seed Feeder Ornaments

Using a piece of wax paper, pack down the bird seed mixture into the cookie cutters.

Cookie Cutter Bird Seed Feeder Ornaments

Cut your straws into pieces, and push one straw piece into each cookie cutter bird seed feeder. This way you will have a hole in the feeder to hang it.

Cookie Cutter Bird Seed Feeder Ornaments

Let your bird seed feeders dry overnight. I flipped mine right before we went to bed for the night.

Cookie Cutter Bird Seed Feeder Ornaments

Pop out of the cutters when they are completely dry. Using twine, hang and let the birds enjoy!

Here is a free pdf download of the recipe.


Bridget Davet / Davet Designs

Using the affiliate links in this blog to make purchases helps support my site. Thank you in advance!

Related Posts Plugin for WordPress, Blogger...